尽管Graphiql界面非常好用,但其毕竟只是一个调试工具,并不适合最终用户。因此,我们需要在一个应用中调用GraphQL进行查询。下面介绍如何在React中(通过Apollo)使用GraphQL,比如查询学生信息,添加新学生等。
GraphQL系列教程:
- GraphQL的设计理念及安装配置
- Schema的基本使用
- GraphQL中的类型及类型间的关系
- 使用MongoDB作为数据存储层
- 在React中使用GraphQL
- 在AWS Appsync中使用GraphQL
- 如何在serverless中定义GraphQL API-不使用AppSync
- 如何在serverless中定义GraphQL API-使用AppSync并使用Lambda作为数据源
创建React应用并添加依赖Apollo
安装create-react-app:
npm install create-react-app -g
npx create-react-app frontend
cd frontend
npm start
这样,就能访问3000端口看到React APP了。
安装依赖库:
npm install apollo-boost react-apollo graphql然后在App.js中使用Applo Client:
import ApolloClient from 'apollo-boost';
import {ApolloProvider} from 'react-apollo';
import StudentList from "./components/StudentList";

const apolloClient = new ApolloClient({
  uri: 'http://localhost:4000/graphql'
})

function App() {
  return (
    <ApolloProvider client={apolloClient}>
      <div className="App">
        <h1>Students</h1>
        <StudentList/>
      </div>
    </ApolloProvider>
  );
}

export default App;
定义一个专门用来保存各种查询语句的组件
添加gql/queries.js,并添加后面可能用到的查询,比如getStudentsQuery, getTutorsQuery:
import {gql} from 'apollo-boost';

const getStudentsQuery = gql`
{
    students {
        id
        name
        address
    }
}
`

const getTutorsQuery = gql`
{
    tutors {
        id
        name
    }
}
`

export {getStudentsQuery, getTutorsQuery};
通过Apollo获取学生列表并显示在StudentList组件中
import React from 'react';
import { graphql } from 'react-apollo';
import NewStudent from './NewStudent';
import { getStudentsQuery } from '../gql/queries';

export default graphql(getStudentsQuery)(function StudentList(props) {

    return (
        <div>
            {
                props.data.loading? <h2>Loading...</h2>:
                props.data.students.map((student) => {
                    return(
                        <li key={student.id}>{student.name}, {student.address}</li>
                    )
                })
            }
            <NewStudent/>
        </div>
    );

})
需要注意的是这行略有些“奇怪”的语句:
export default graphql(getStudentsQuery)(function StudentList(props) 本来函数式组件的声明是这样的:
export default function StudentList(props) 经过graphql(getStudentsQuery)调用后,会将获取的数据,比如data(包含students)注入到组件的props中。
如果出现CORS问题,需要回到server项目中,安装cors:
npm install cors然后在app.js中添加:
const cors = require('cors');

app.use(cors());
实现Student组件
添加一个新的组件:components/NewStudent.js
import React from 'react';
import { graphql } from 'react-apollo';
import { getTutorsQuery } from '../gql/queries';
export default graphql(getTutorsQuery)(function NewStudent(props) {
const loadTutors = () => {
if(props.data.loading) {
return(<option>Loading tutors...</option>);
}else{
return props.data.tutors.map((tutor)=>{
return(<option key={tutor.id} value={tutor.id}>{tutor.name}</option>)
})
}
}
return (
<div>
<h3>Add a student</h3>
<form id="new-student">
<div className="input_field">
<label>Name</label>
<input type="text"/>
</div>
<div className="input_field">
<label>Address</label>
<input type="text"/>
</div>
<div className="input_field">
<label>Tutor</label>
<select>
<option>Select tutor</option>
{loadTutors()}
</select>
</div>
<button>Add</button>
</form>
</div>
);
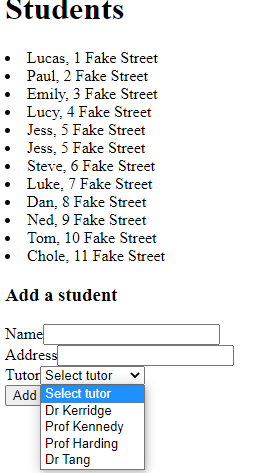
})这样就可以看到如下的表单,界面丑了些,但这不是这个教程的重点:
通过调用GraphQL的mutation实现添加学生信息
安装依赖库
首先安装需要的一个包:
npm install lodash在NewStudent.js中引入:
import {flowRight as compose} from 'lodash';使用useRef hook获取表单字段:
import React, {useRef} from 'react';在组件内声明:
const nameElement = useRef('');
const addressElement = useRef('');
const tutorElement = useRef('');
在表单中使用:
<div className="input_field">
    <label>Name</label>
    <input type="text" ref={nameElement}/>
</div>

<div className="input_field">
    <label>Address</label>
    <input type="text" ref={addressElement}/>
</div>

<div className="input_field">
    <label>Tutor</label>
    <select ref={tutorElement}>
        <option>Select tutor</option>
        {loadTutors()}
    </select>
</div>
在handleSubmit中就可以通过如下方式访问了:
nameElement.current.value声明graphql mutation
修改gql/queries.js:
const addStudent = gql`
mutation($name: String!, $address: String!, $tutorId: ID!){
   addStudent(name: $name, address: $address, tutorId: $tutorId) {
       name
       id
   }
}
`

export {getStudentsQuery, getTutorsQuery, addStudent};
在React组件中使用两个GraphQL
import { getStudentsQuery, getTutorsQuery, addStudent } from '../gql/queries';

export default compose(
    graphql(getTutorsQuery, {name: "getTutorsQuery"}),
    graphql(addStudent, {name: "addStudent"})
)(function NewStudent(props) {
在表单提交事件中使用mutation
const handleSubmit = (e) => {
    e.preventDefault();
    props.addStudent({
        variables: {
            name: nameElement.current.value,
            address: addressElement.current.value,
            tutorId: tutorElement.current.value
        },
        refetchQueries: [{query: getStudentsQuery}]
    });
}需要注意refetchQueries这行很重要,一旦添加学生,就会触发重新获取GraphQL的事件,使得页面自动更新。
添加学生详细信息组件
添加相应的GraphQL查询
更新gql/queries.js:
const getStudentQuery = gql`
    query($id: ID){
        student(id: $id) {
            id
            name
            address
            tutor {
                name
                id
            }
        }
    }
`
添加StudentDetails.js
import React, {useRef} from 'react';
import { graphql } from 'react-apollo';
import {getStudentQuery} from '../gql/queries';

export default graphql(getStudentQuery, {
    options: (props) => {
        return {
            variables: {
                id: props.id
            }
        }
    }
})(function StudentDetails(props) {

    const showStudent = () => {
        const {student} = props.data;

        if(student) {
            return (
                <div>
                    <h2>{student.name}</h2>
                    <p>{student.address}</p>
                    <p>Tutor: {student.tutor.name}</p>

                </div>
            )
        } else {
            return(
                <h2>No student choosed.</h2>
            )
        }
    }

    return (
        <div id="student-details">
            {showStudent()}
        </div>
    )
})
更新StudentList组件
使用useState Hook:
import React, {useState} from 'react';

const [currentStudentId, setCurrentStudentId] = useState(null);
对于每条列表项,添加单击的响应事件:
<li onClick={(e) => {setCurrentStudentId(student.id)}} key={student.id}>{student.name}, {student.address}</li>同时在页面中添加对StudentDetails的引用。