在现代Web应用开发中,通过OAuth进行登录几乎已经成了标配,下面介绍如何通过AWS Amplify实现Google OAuth登录。

AWS Amplify系列教程:
Google中的配置
在Google中创建一个项目
首先在Google中创建一个项目:https://console.cloud.google.com/projectcreate
单击Create后进入项目的Dashboard:
https://console.cloud.google.com/home/dashboard
配置OAuth consent页面
- App name: 随便起,比如Amplify Test App
- User support email:输入自己的email
- App logo:可选
- App domain: http://localhost:3000 (开发时使用,产品模式下肯定是自己的域名)
- App privacy policy link: http://localhost:3000 (开发时使用,产品模式下肯定是自己的域名)
- App Terms of Service link: http://localhost:3000 (开发时使用,产品模式下肯定是自己的域名)
- Authorised domains: amazoncognito.com
单击“Save”
Credentials
进入Credentials页面:https://console.cloud.google.com/apis/credentials
- Create Credentials -> OAuth client ID
- Application type -> Web application
- Name: Amplify-test (名字随意起)
- Authorised JavaScript origins: http://localhost:3000
- Authorised redirect URIs:
**https://amplifytest.auth.eu-west-1.amazoncognito.com/oauth2/idpresponse, 注意这里使用的其实是AWS Cognito Pool对应的域名,这个属性可以临时先空一下,等后面使用Amplify创建了User Pool之后可以登录到AWS Cognito控制台设置/获取。
单击 “Create”同时保存好Googel APP client ID / Secret,后面将要用到:
Client ID: xxxxxx.apps.googleusercontent.com
Client Secret: GOCSPX-xxxxxx
创建React APP
创建React应用并配置Amplify
npx create-react-app amplify-oauth-demo
cd amplify-oauth-demo
amplify init
上面过程非常简单。结束后运行:
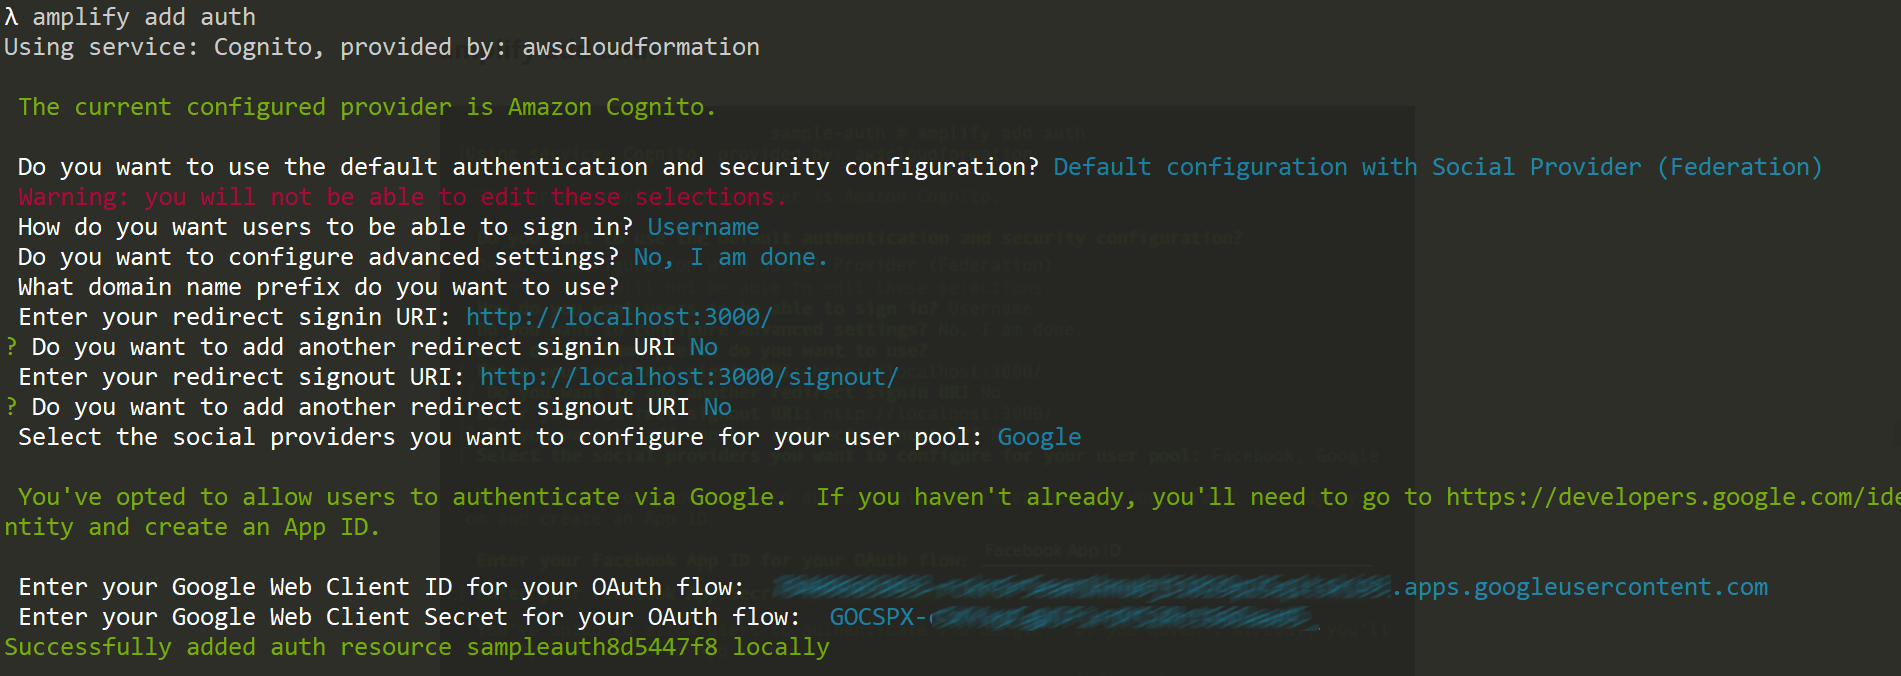
amplify add auth其基本配置很简单,只不过需要选择”Default configuration with Social Provider (Federation)”并输入Google的APP ID/Secret:
添加实现代码
将React应用中代码进行简化并增加认证功能。
index.js
首先更改index.js:
import React from 'react';
import ReactDOM from 'react-dom';
import Amplify from 'aws-amplify';
import config from './aws-exports';
import App from './App';

Amplify.configure(config)

ReactDOM.render(
  <React.StrictMode>
    <App />
  </React.StrictMode>,
  document.getElementById('root')
);
App.js
import { useState, useEffect } from 'react';
import { Auth } from 'aws-amplify';
import './App.css';
function App() {
const [user, setUser] = useState(null)
useEffect(() => {
checkUser()
}, [])
async function checkUser() {
try {
const currentUser = await Auth.currentUserPoolUser();
setUser({username: currentUser.username, ...currentUser.attributes})
console.log(currentUser);
} catch (error) {
console.log(error);
}
}
function logOff() {
Auth.signOut();
}
if(user) {
return(
<>
<p>{ user.username } : { user.email }</p>
<button onClick = { logOff} > Log off</button>
</>
)
} else {
return (
<button onClick={() => Auth.federatedSignIn( {provider: "Google"})}>Login via Google</button>
);
}
}
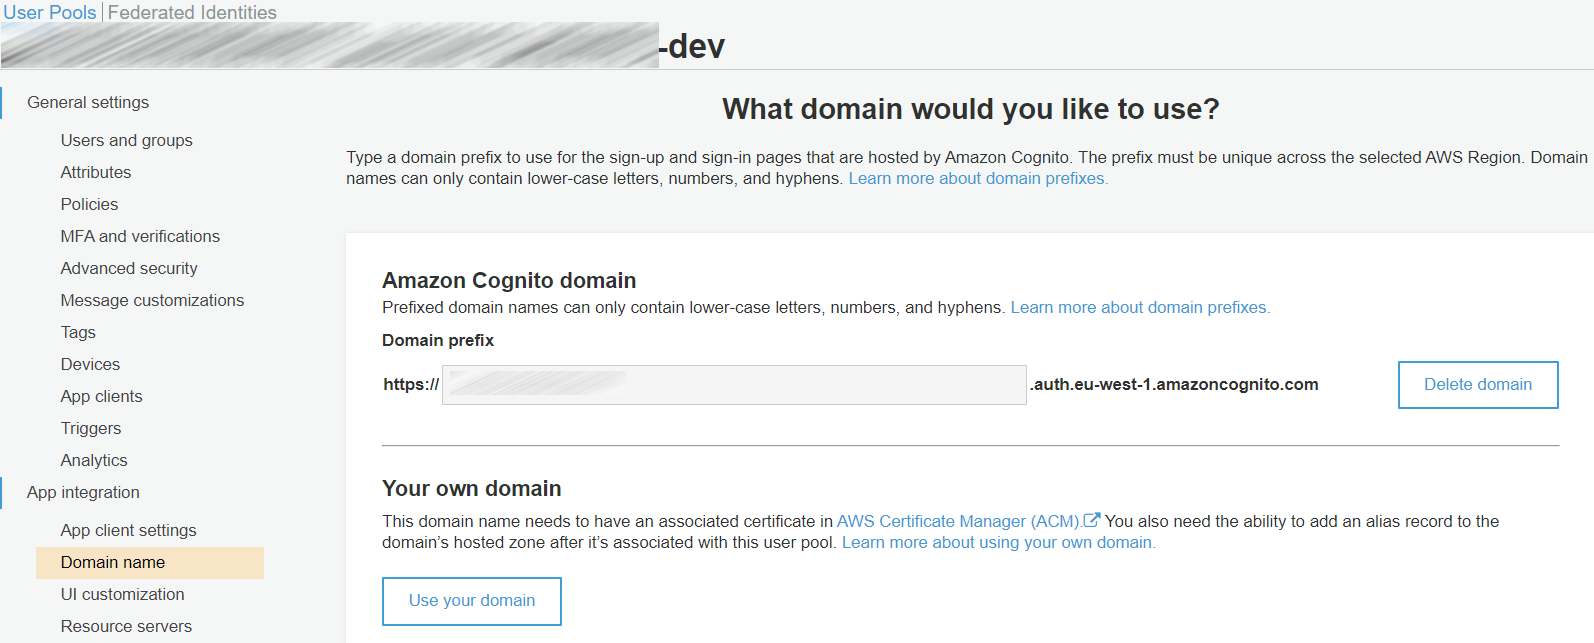
export default App;设置Cognito user pool域名
进入User Pool => App integration => Domain name,设置域名
aws-exports.js
更新aws-exports.js,添加domain属性:
"oauth": {
"domain": "xxxx.auth.eu-west-1.amazoncognito.com/",
"scope": [
"phone",
"email",
"openid",
"profile",
"aws.cognito.signin.user.admin"
],
"redirectSignIn": "http://localhost:3000/",
"redirectSignOut": "http://localhost:3000/signout/",
"responseType": "code"
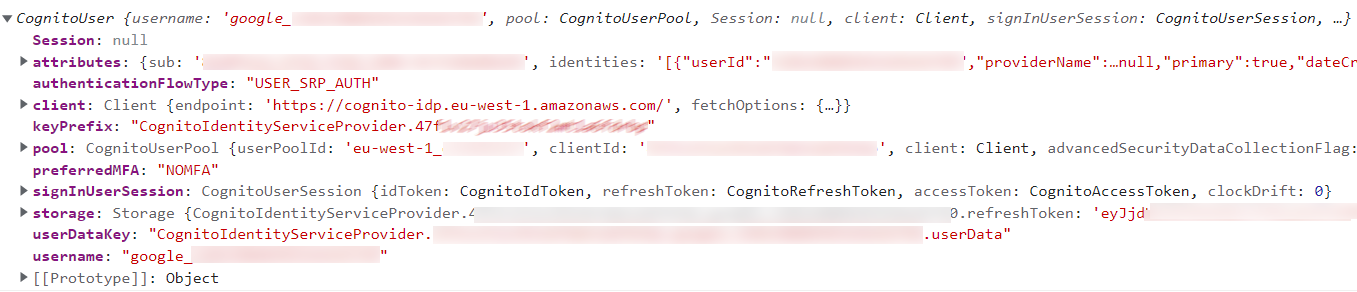
},如果输出一下currentUser,就会看到类似这样的一个CognitoUser对象:
测试
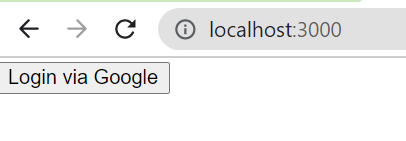
访问:http://localhost:3000 将会看到简单的登录页面:
单击“Login via Google”之后会进入Google授权页面:

需要注意的是,在授权页面中显示的是授权给amazoncognito.com,也就是说,在使用OAuth进行登录验证的时候,不仅前端需要发出请求,后台也需要做相应的管理工作,只不过在使用Amplify的时候,后台用的是AWS Cognito。
授权后看到的就是这样的登录成功页面:

清除资源
如果只是在做测试的话,结束后应清除相应资源:
amplify delete同时在Google中删除相应的APP。